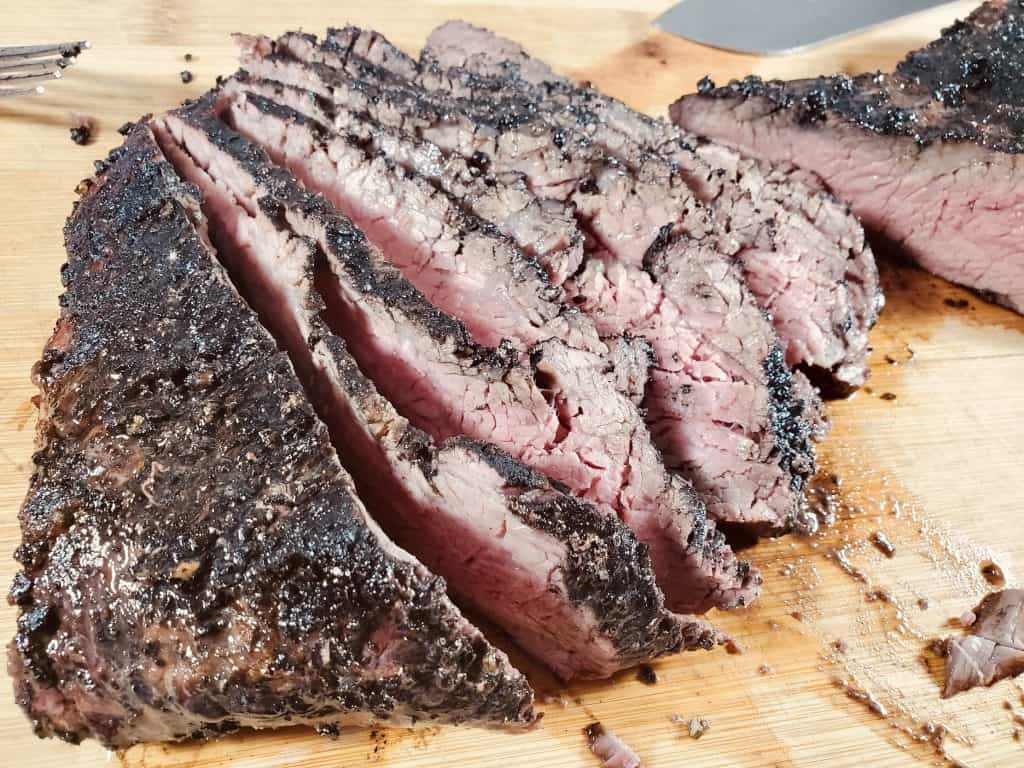
Brisket is one of the yummiest pieces of meat. You can cook it in many ways, of course the best way is to smoke it though. Before cooking, you need to trim the fats so that you can make a delicious brisket. Don’t know how to trim a brisket? Don’t worry, we’re about to go over it step by step below.
Steps On How To Trim a Brisket
The following are the steps to cut all the unnecessary fats off the brisket to make it healthier and tastier.
Step#1: Bring Your Brisket & Choose Your Knife
Choose brisket according to your choice. Do you like to buy a big one or a small one? It’s best to trim the fat as soon as you get home but you can put it in the freezer until the day before you need to cook it. Toss it on your kitchen counter a night before you want to cook, and then rinse it. Let it dry.
Meanwhile, think which knife will be best to cut out the fat? Although you can use any knife, the boning knife is best for this task. Just make sure that the knives you are using have good blade length.
Step 2: Plan Brisket Cuts
Toss the brisket on your cutting board. Usually, there are two sides of brisket: flat side and point side. The flat side, as the name suggests, is the one that has a flat surface. The point side has an uneven or rough surface. You need to start the cutting process from the flat side to the point side. You will see different kinds of fats. Some of them look like a leather skin, others are little waxy, and the rest have a softer and delicate look. You can never render down the first two kinds of fats.
No matter how much you cook, the big chunks or thick surfaces of fats cannot render down. And of course, you don’t want to eat them either. Leaving these parts of the fats means you have to cut them after cooking, and also, you will need a greater cooking time for your brisket. This is because greater mass takes a longer time to allow the heat to penetrate into the meat and get it to the temperature you want.
Step#3: Start Trimming The Brisket
Okay, it’s time to free the brisket from fats. Make shallow cuts with your chosen knife in a parallel position. Try to make a long cut to hold the fat from your left hand, which allows you to cut the remaining fats with much ease. Don’t forget to start cutting from the flat side and take it to the point side.
You can accidentally cut the meat in some parts, but try to keep the cuts shallow. You will see some left fat parts on the areas that you have cleaned, which are delicate fats. According to the general rule, you can let ¼ inch of fat on brisket if you don’t want to trim the entire fat from it. Don’t forget that smoke or seasoning can never penetrate more than the ¼ inch. So, if you are thinking of making your brisket flavorsome and delicious, you need to trim out most of the fat layer. While you are trimming the fats, put them in a trash bowl.
Step#4: Remove All Fat From The Brisket
Continue trimming the brisket from the flat side to that point side. You will find waxy fat parts on the point surface. Yes, you need to be patient; this task will take time.
When you have finally completed the trimming, examine the point and flat parts of your brisket, and check the direction the grain on meat is running. When you slice it, you will need to do that across the grain so that you have nice and tender slices. Moreover, you will also get an idea that the grain of flat and point areas are not the same. This is the reason why people separate the flat and point areas after cooking.

Step#5: Slice out the Point End Fat
Once you have cut all the fat from the flat part, there is another area you need to focus on. You will notice a big chunk of fat present at the end of the point part, but it is partially separated from both flat and point surfaces.
You need to trim out that part as much as possible. This is a place where you will surely need a boning knife with a good blade as you have to use vertical cuts to detach it from the brisket.
Step#6: Time to Admire Your Work
Okay! After all these efforts, you surely need to pat yourself. Before turning your brisket to do the task on the other side, see how smoothly you have cut down the fat. Be thankful that you have made your cooking time easy by cleaning all the inedible fat.
Step#7: Turn & Do it Again
Flip your brisket and repeat the process on the other side. You will immediately note which part you need to trim down deeper and where you need to use shallow strokes. Not to mention, you will surely trim down this area more neatly than the one before. Don’t forget to remove the chunk of fat on this part, just like you have done before.
Just be careful, and follow the same procedure. Don’t try to hurry. Go slow, and you will not go wrong.
Step#8: Brine And Season Your Brisket
Removing all the unnecessary fat from the brisket saves your 4 to 6 hours of cooking time, which is pretty great. Yes, the cooking time will also depend on what temperature you will cook at. But now you don’t have any constraints and can cook your brisket on its actual time. Make sure to brine the brisket first. I normally dry brine mine. From here, you can easily season or rub your meat to make it ready for cooking.
Step#9: Throw Excess Fat
You can use trimmed fat in making sausages by grounding them. Of course, you will have to make sausage in your home to use fats. But if you are not making it, then this excess fat is no more than trash. Throw it out.
Wrapping It Up
Now that you have learned how to trim a brisket, you can easily cook mouthwatering and tasty brisket for you. J
ust follow the instructions closely, and then you won’t face any problems.